
Assigning the Department Reviewer Role
If your organization subscribes to Insight eDiscovery, you can assign the Department Reviewer role to a user. This role provides additional privileges for searching and reviewing department-specific data to support discovery and investigation requests.
Some important facts about this role:
-
A Department Reviewer can see emails, collaboration messages, and files only from the departments assigned to them.
-
A Department Reviewer cannot access the On-going Search node and cannot create ongoing searches.
-
A Department Reviewer role cannot access Legal Hold, Tag, or Retention Tag functionalities, as these features are not yet available for this role.
-
If the Department Reviewer previously served as a normal Reviewer(to review custodian), any saved searches created under that role remain accessible under theStandard Searches node even after being a Department Reviewer. You must rerun the search to view results specific to your assigned departments.
-
When switching between the Reviewer and the Department Reviewer roles, the application displays a notification indicating that the search was created with a different role. The user must rerun the search to generate accurate results.
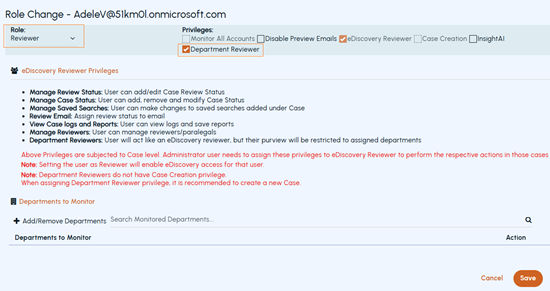
To assign the Department Reviewer Role
-
In the left navigation pane, select Role Management>Assign Accounts.
-
Search for and select the user to assign the Department Reviewer role. The Role Changepage appears.Note: To search for the required user, enter the user name or email in the search field and click theSearchicon. Or, expandAdvanced Search, enter the email, name, or role, and click Apply. Or, expand theRoles section and select a role.
-
In the Roledrop-down, selectReviewer.
-
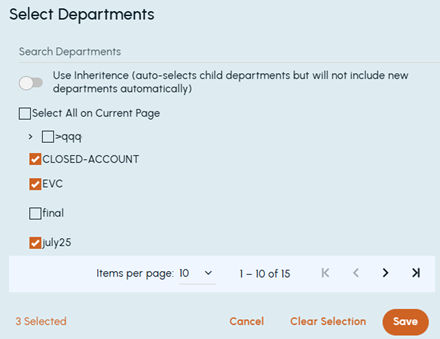
Under Departments to Monitor, clickAdd/Remove Departments. TheSelect Departments dialog appears.
-
In the Select Departments dialog box, do the following as needed:
-
(Optional) Turn on Use Inheritance to auto-select child departments (new departments are not included automatically).
-
To select all departments on the page, select the Select All on Current Page checkbox.
-
To select specific departments, manually select the required check boxes. Use navigation arrows to move between pages if the list is long. Review the count of selected departments at the bottom (for example, 1 Selected). Click Save.
-
To clear the field values in the dialog box, click Clear Selection. To exit without saving, clickCancel.
-
-
To remove a department, click the Delete icon in the corresponding row.
-
On the Role Changepage, clickSave.
Related information