
Creating or editing tags
The Arctera Classification comes with a large number of built-in tags, but you can create custom tags if the built-in ones do not meet your needs.
You cannot edit the built-in tags, but you can edit the descriptions of the custom tags.
To create or edit a tag
-
In the left pane of the Arctera Classification , click Tags.
-
Do one of the following:
-
To create a tag, click New.
-
To edit an existing tag, select it and then click Edit.
-
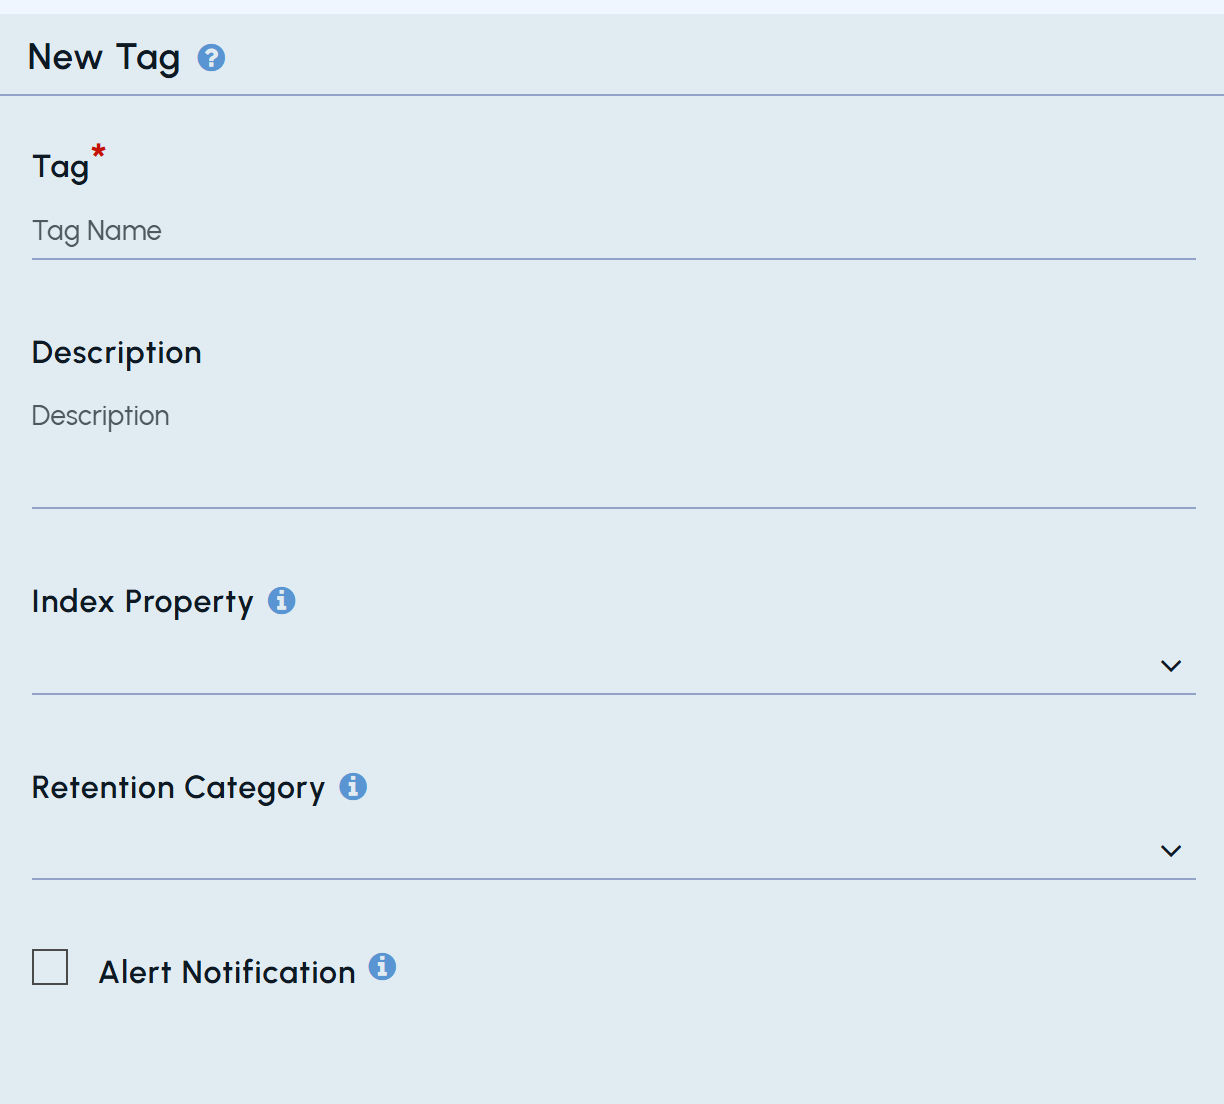
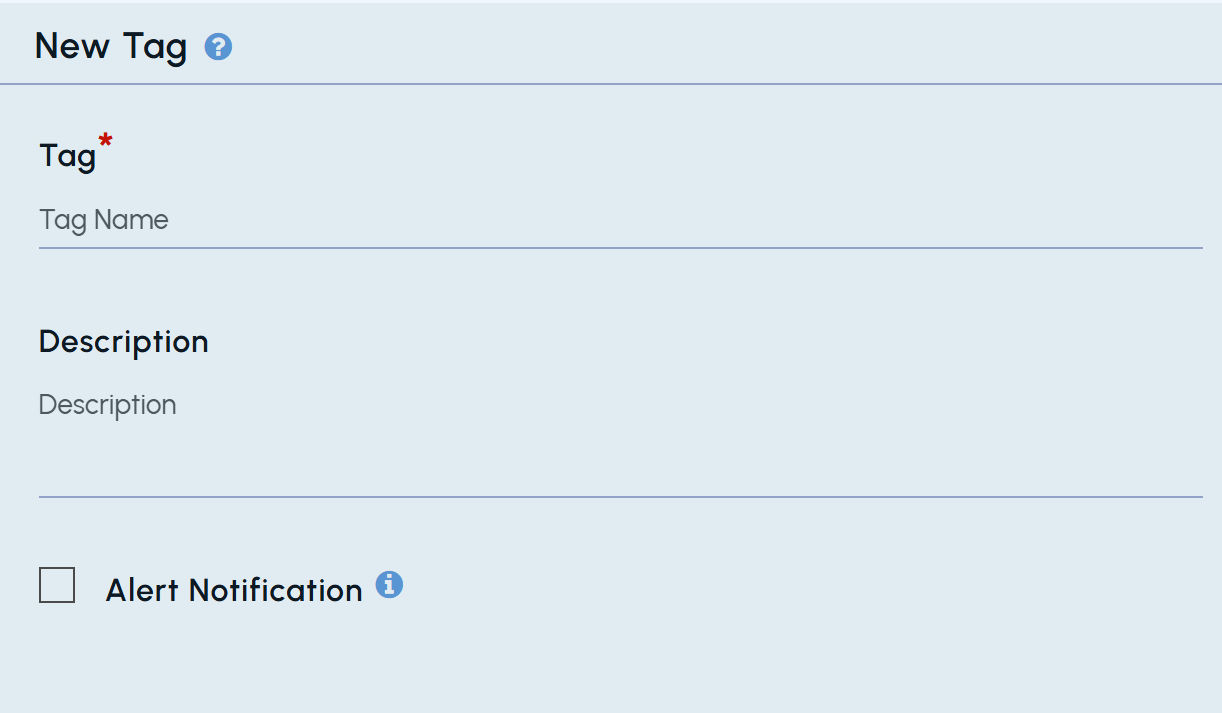
Depending on the property definition value setup in yaml, specific to the product, one of the following pop-up will appear on the screen.
 |
|---|
-
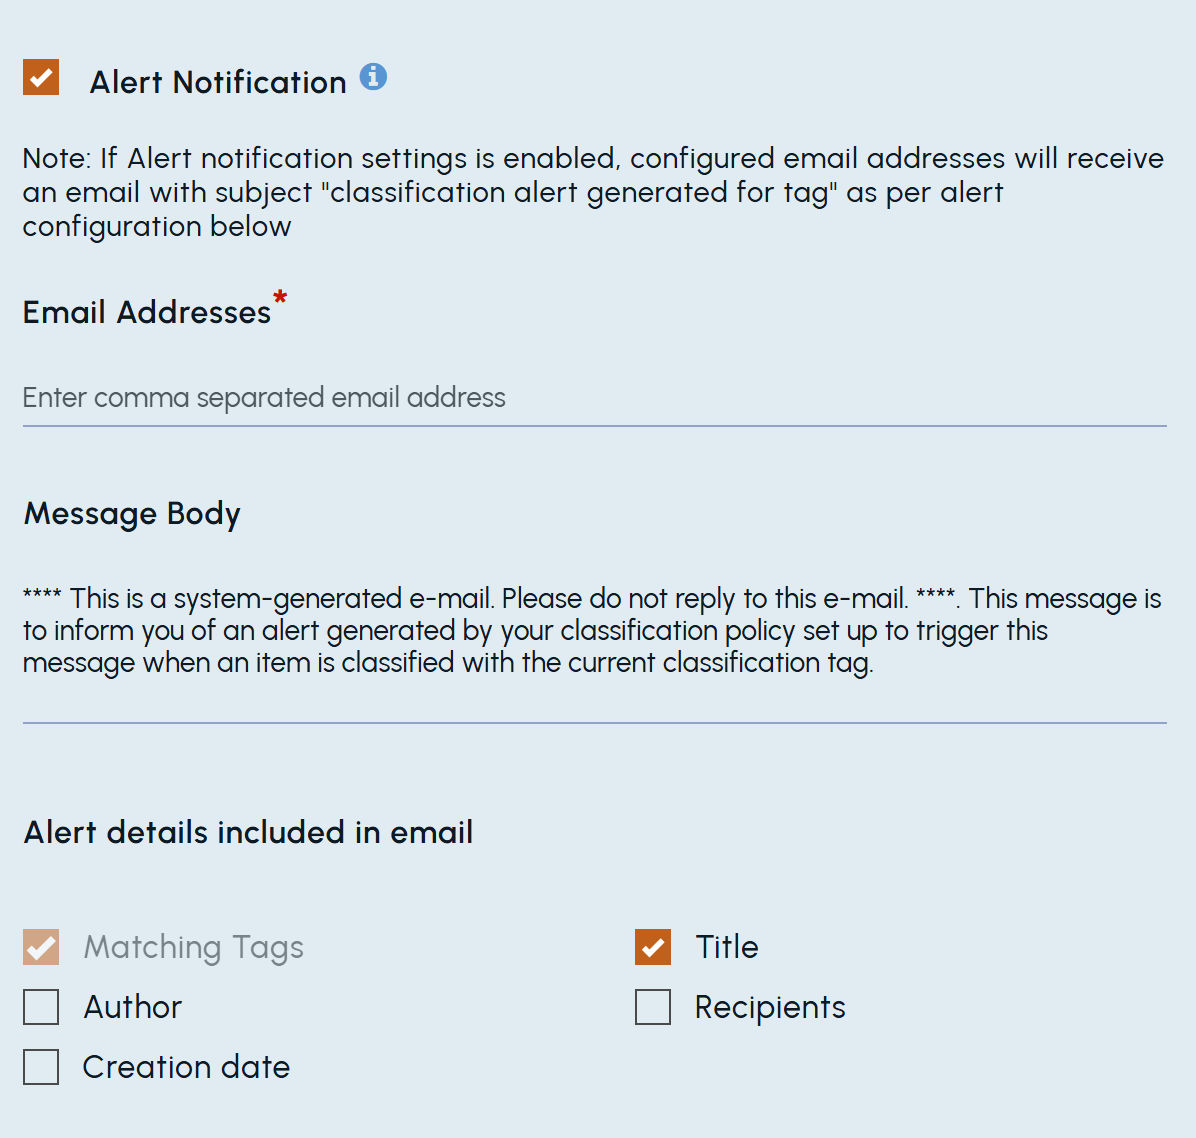
If you have opted for email alert notification through yaml and check the box on this screen, alert notification details will appear on the screen.
-
Set the fields as follows:
Tag Specifies the tag name. The name must be unique, and it can contain up to 30 alphanumeric, space, and special characters. However, the name must not include the following characters\: & : / \ % + < > ? If you are editing an existing tag, you cannot change its name. Description (Optional.) Provides a short description of the tag for display in the Arctera Classification. Index Property (Optional.) Select one applicable option from the drop-down. Retention Category (Optional.) Select one applicable option from the drop-down. None option will be selected by default. The Retention Category is a managed tag associated with a retention policy. Managed tags can be created and managed in the Alta View under Configuration -> Managed Tags . This category helps in managing the retention of archived items based on predefined policies. By assigning a retention category to a tag, you ensure that tagged items comply with the retention rules linked to that category. This ensures consistency and compliance with organizational data retention requirements Email Addresses Add comma separated list of email addresses, who will receive email alerts when an item is classified with this tag. Message Body (Optional.) Update this field if you want to add specific instructions for the email recipients. Alert details included in email Alert details that will be included in the alert email. You can check or uncheck options except Matching Tags , which selected by default. Note: Author, Creation date, Title and Recipients fields will be available for selection. If you want any additional fields, edit the yaml and set the values accordingly. -
Click Save to complete the process.
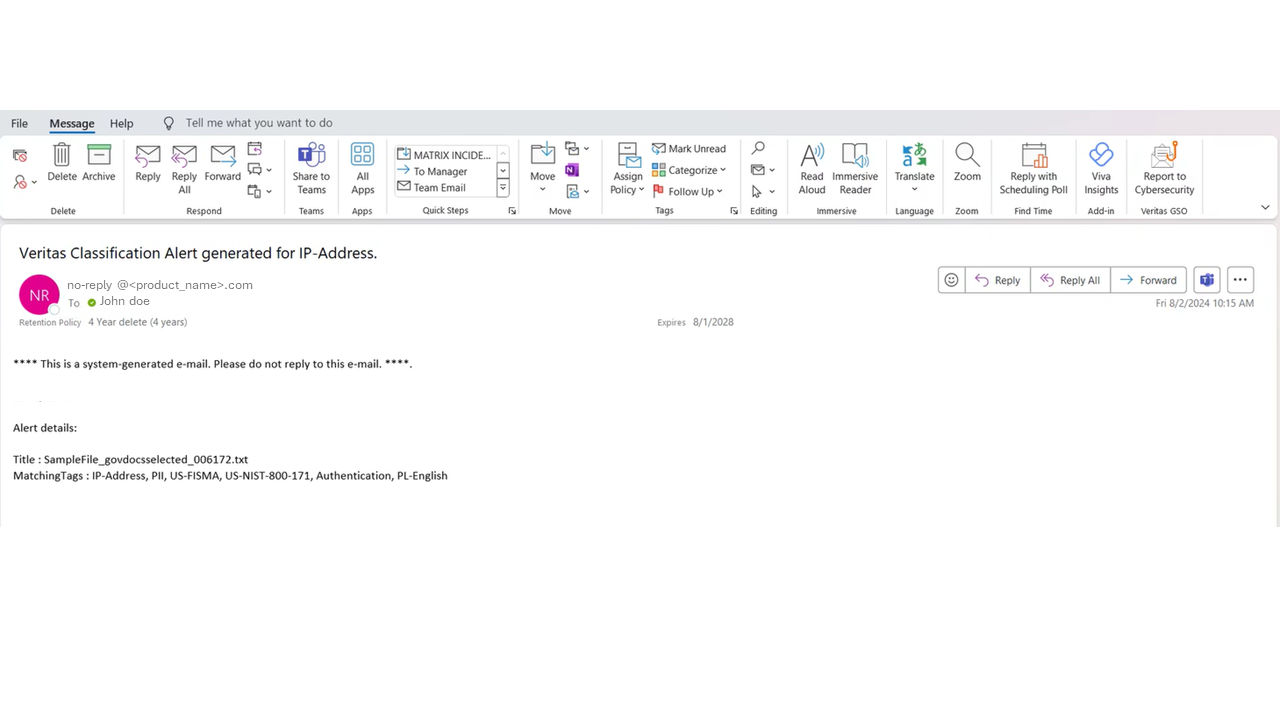
If you have opted for email notification while creating or editing a tag, an email will be sent to the specified users whenever a tag is used for classification.
 |
|---|
Related information