
Creating policies
Arctera Classification includes a large number of built-in policies that cover many regulations and corporate standards. You can create custom policies when the built-in policies do not meet your organization's requirements.
You can also edit existing policies. However, in the case of the built-in policies, the changes that you can make are quite limited.
To create a new policy
-
In the left navigation pane, click Policies.
-
Click Create Policy.The Create Policy dialog box appears.
-
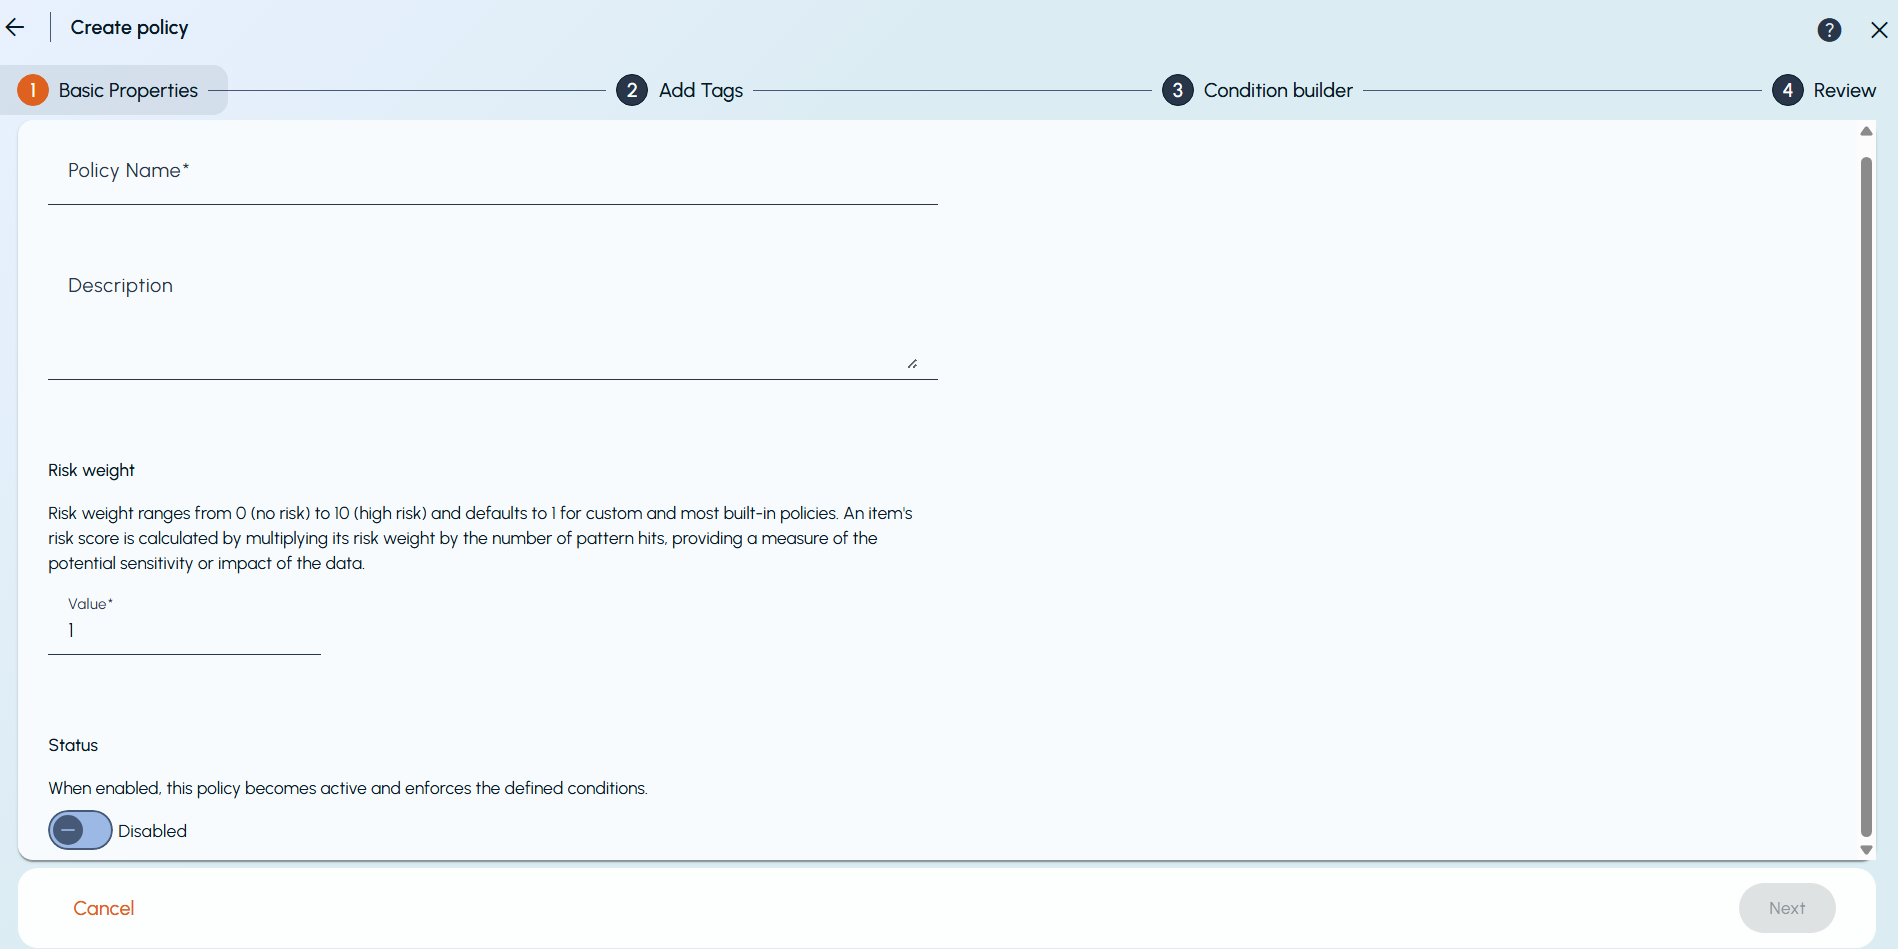
Under Basic Properties, specify the following details:
Property Details Policy Name Specifies the policy name. The name must be unique, and it can contain up to 100 alphanumeric, space, and special characters. Description (Optional) Provides a short description of the policy for display in Arctera Classification. Risk weight Specify the risk weight for the policy. This is a mandatory field. By default, the risk weight value of all the custom policies and most of the built-in policies is configured as 1. Users can modify the risk weight value in the range of 0 to 10. Status Enables or disables the policy. You must enable the policy if you want Arctera Classification to check for and tag the items that match the policy. Complete the required fields before proceeding to the next step.Click Next or Cancel. -
Under Add Tags, specify the following details:
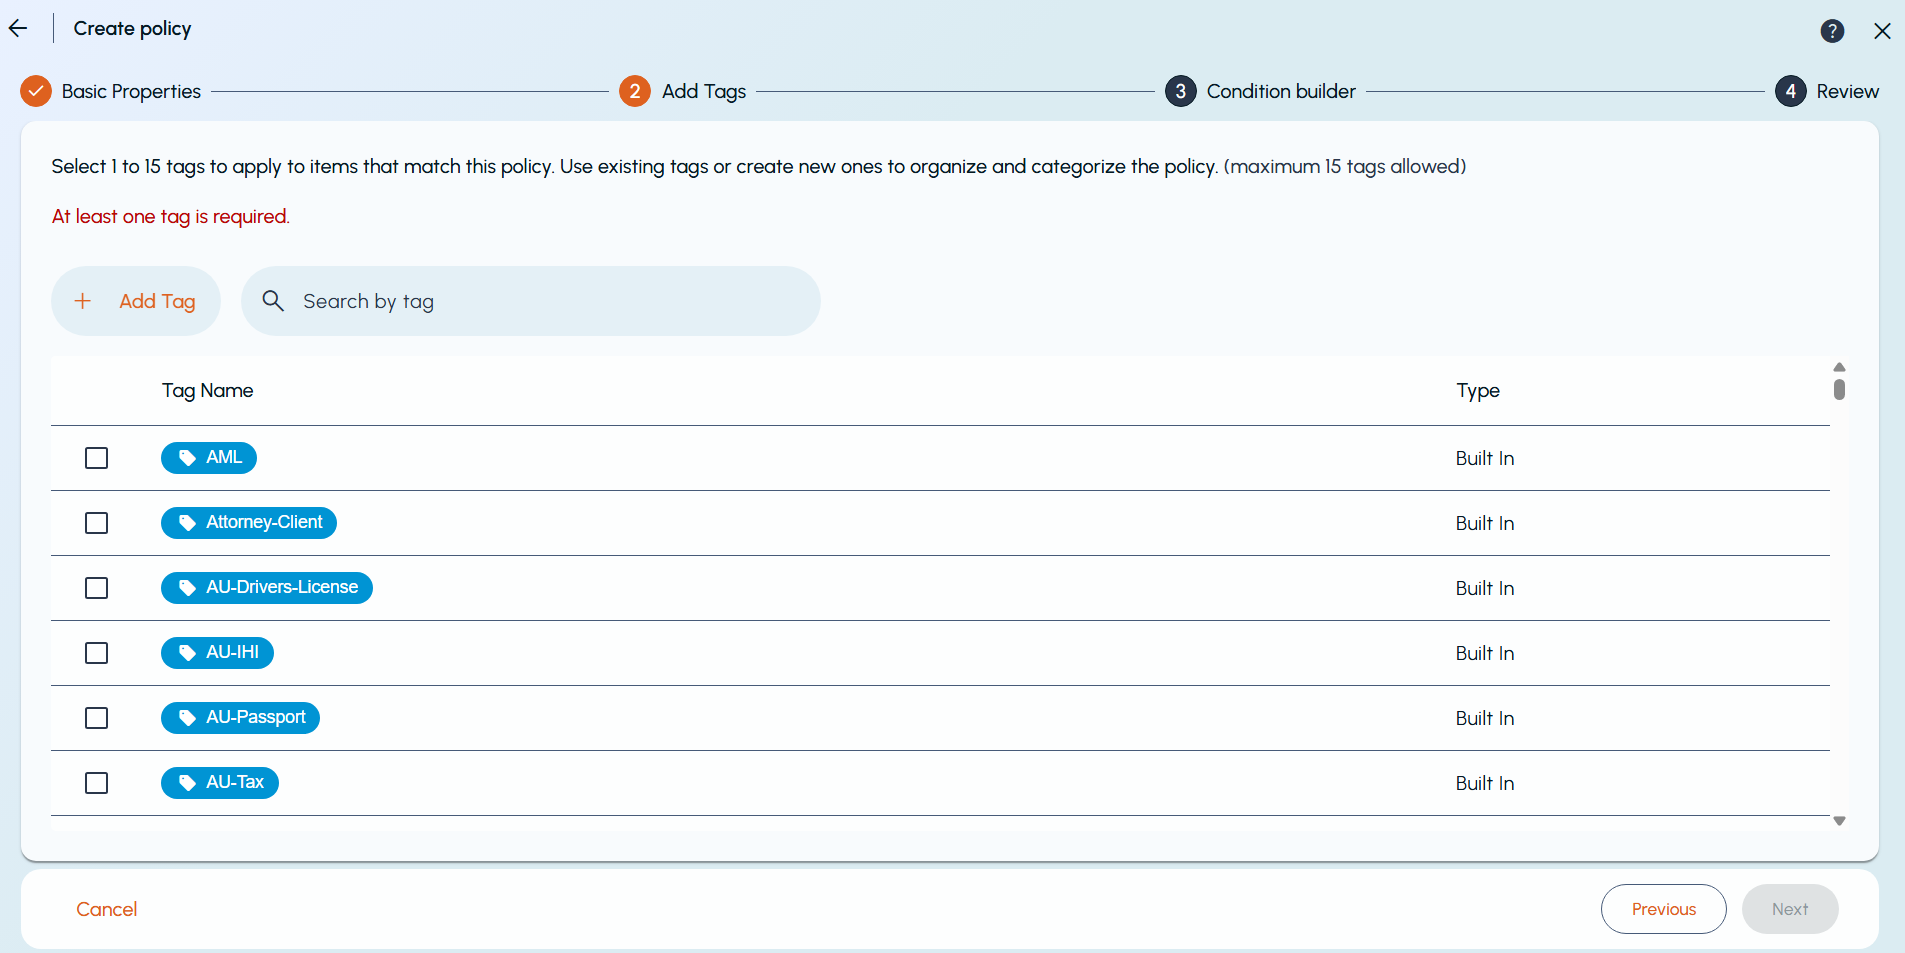
Property Details Tags Nominates one or more tags that you want to apply to the items that match the policy conditions. Choose from a list of the available tags, search existing tags, or click Add Tag to create a new tag directly from this page without leaving the policy creation workflow. To know more about creating tags, see Creating or editing tags. Click Next, Previous, or Cancel. -
Use the Condition Builder to create the logic that determines whether an item matches the policy. You can combine one or more conditions into groups to create simple or complex policy logic.
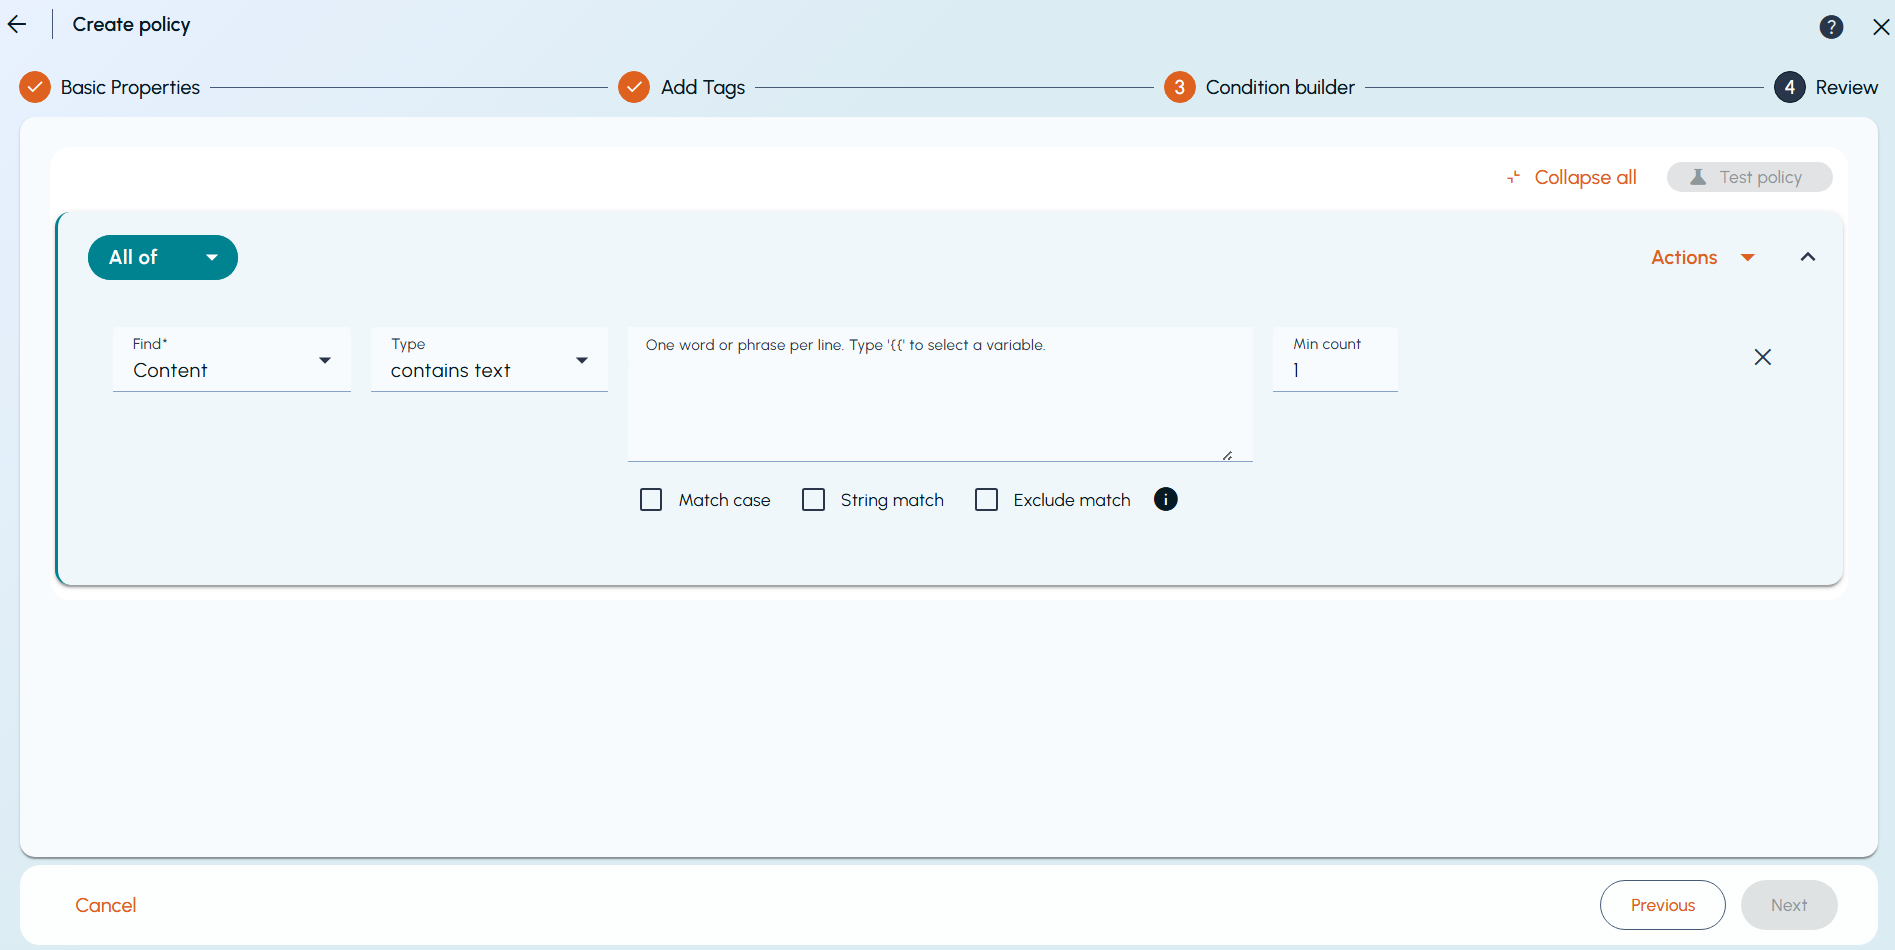 The Condition Builder supports the following condition groups:
-
All of: All conditions in the group must be met.
-
Any of: At least one condition in the group must be met.
-
None of: None of the conditions in the group must be met.
Specify the following details for each condition:Property Description Find Select the item property to evaluate, such as Content, Title, Author, or Recipients. Type Select the type of comparison to perform, such as contains text, matches regex, matches pattern, language is, or sentiment score. Keywords / Value Enter the text, regular expression, variable, or other value to match. Type {{to insert a predefined variable.Min count Specify the minimum number of matches required for the condition. Match case Select to perform a case-sensitive match. String match Select to match the entire string instead of a partial match. Exclude match Select to exclude items that match the specified value. Use the Actions menu to perform the following operations:Action Description Add condition Adds a new condition to the current group. Add child group Adds a nested group under the current group. A maximum of 10 child groups can be added within a hierarchy. Add parent group Adds a parent group above the current group. A maximum of 10 parent groups can be added within a hierarchy. Delete group Removes the selected group. A group can be deleted only if it contains one child. You can also use the following options while building conditions:-
Expand and Collapse condition groups to simplify navigation through complex policy logic.
-
Test policy to validate the policy against a sample file before saving.
-
Copy keywords to duplicate keyword values from another condition.
-
Expand to variable to replace entered keywords with a predefined variable.
Notes:-
The maximum depth of a condition hierarchy is 10 levels.
-
Parent groups can be added only to existing groups, not to individual conditions.
-
Color-coded condition groups help distinguish nested groups when working with complex policies.
For more information, see About policy conditions. -
-
Review all the details provided so far before saving. You can Edit Basic Info, Edit tags, or Edit Conditions, if required.
-
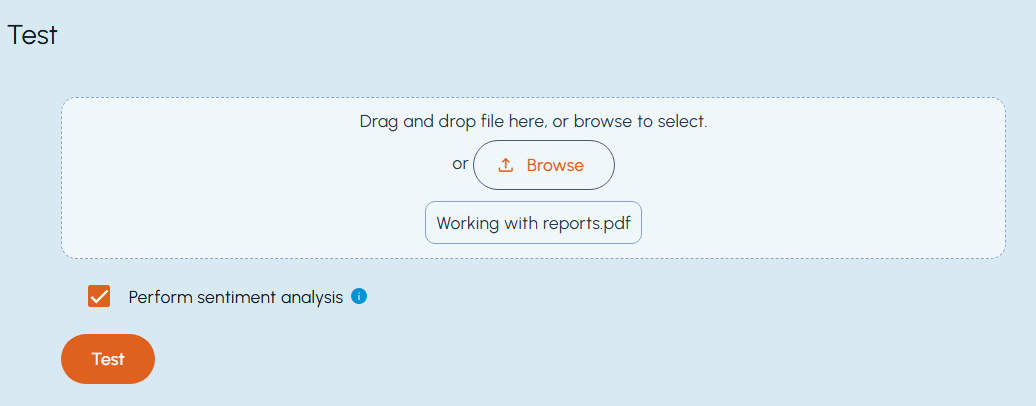
To test the policy that you are creating, under Test policy (Condition Builder) or Test (Review), click Browse and then select an item that ought to match it.
-
To test the same document again, click the Refresh icon.
-
To perform sentiment analysis on the selected item (to determine whether the sentiment associated with the item is positive, negative, or neutral), select the Perform sentiment analysis checkbox. If this check box is selected, a sentiment score tag is displayed to show the sentiment analysis score. The sentiment analysis score details are displayed if the policy has a condition associated with the sentiment, and the item meets the criteria.
Click Next, Previous, or Cancel.After finding a match, do the following:-
Click Show details to see the matching text and confidence levels.
-
Click More details to see the risk level and risk score of the document.
-
-
After testing the policy, click Save.
Related information