
Adding a New Importer
You will see a blank page or the list of already configured collectors.
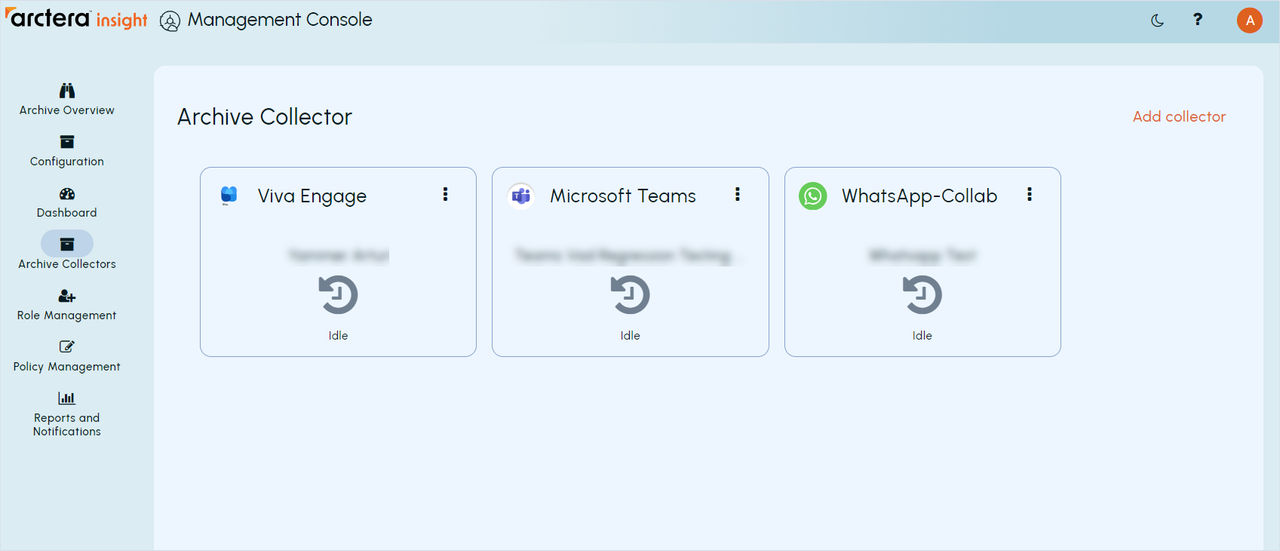
To add a new importer:
-
Click the Add collector button on the top left corner. A configuration wizard of adding a new importer will appear.
-
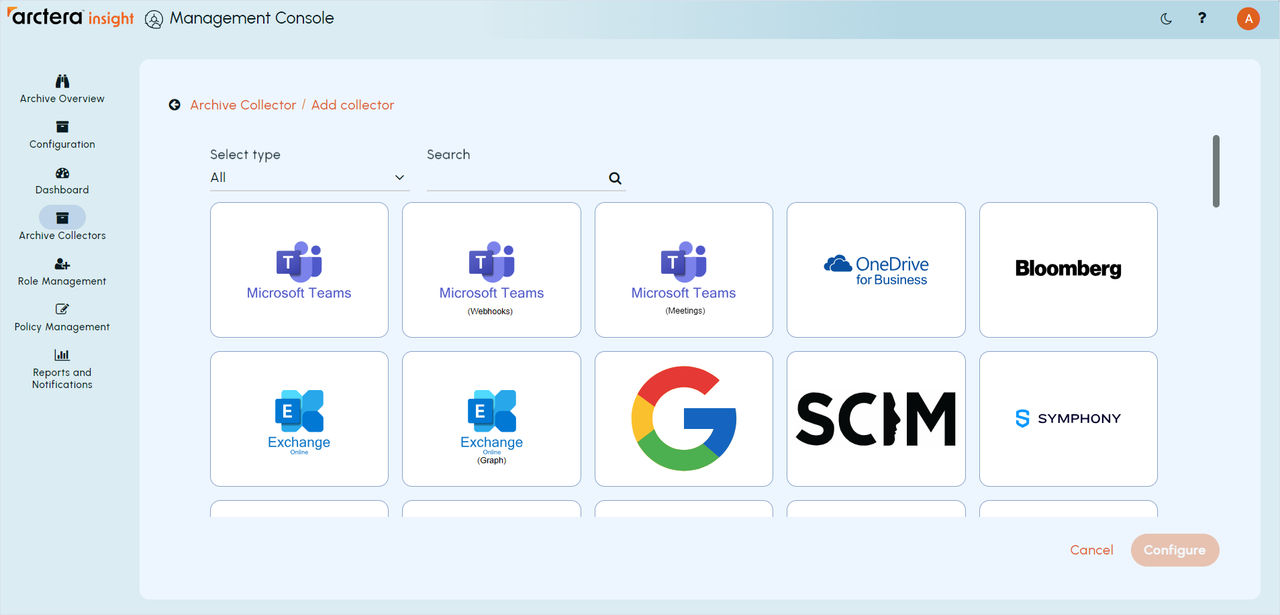
Select your source and click Configure. Here you can make use of:
-
Searching option - type the name of the source in the search box located above the sources:
-
Filtering option - select one of the following source types from the drop-down list above the sources:
-
Collaboration
-
Enterprise tools
-
File sharing
-
Financial platforms
-
Mobile and text
-
Voice
-
Others
-
-
-
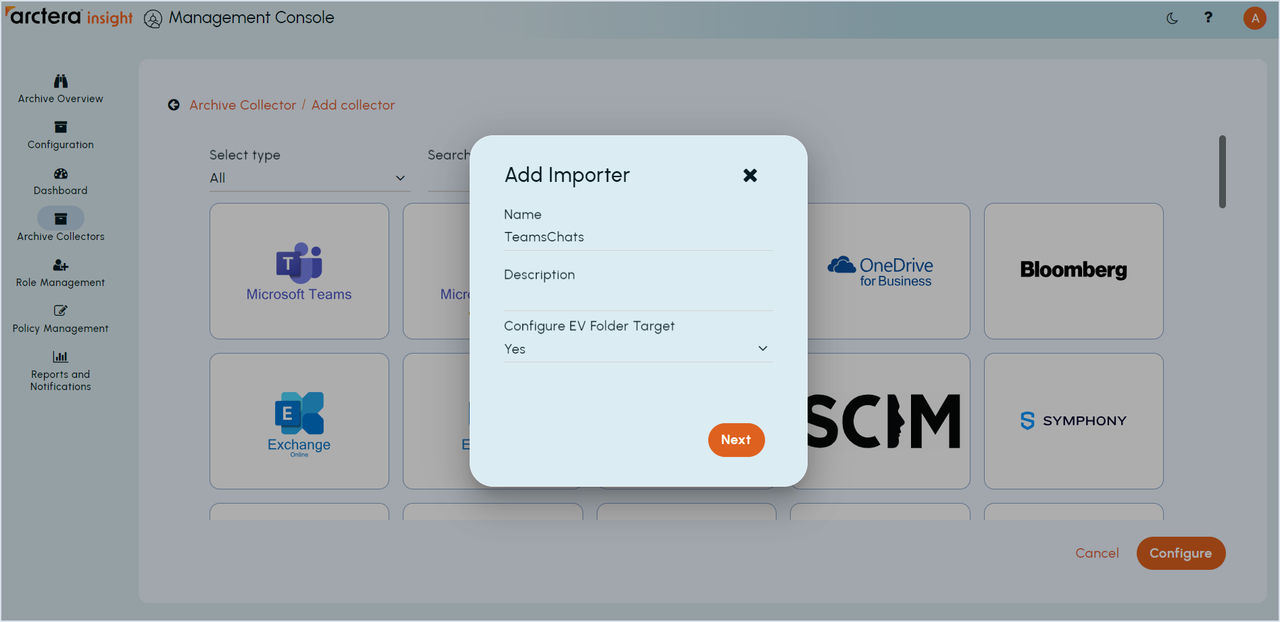
Fill in the Name and the Description fields, choose whether you want to deliver the collected data to EV folder target, and click NEXT.
-
Make the necessary changes.Note: From collector to collector the Source tab may vary.
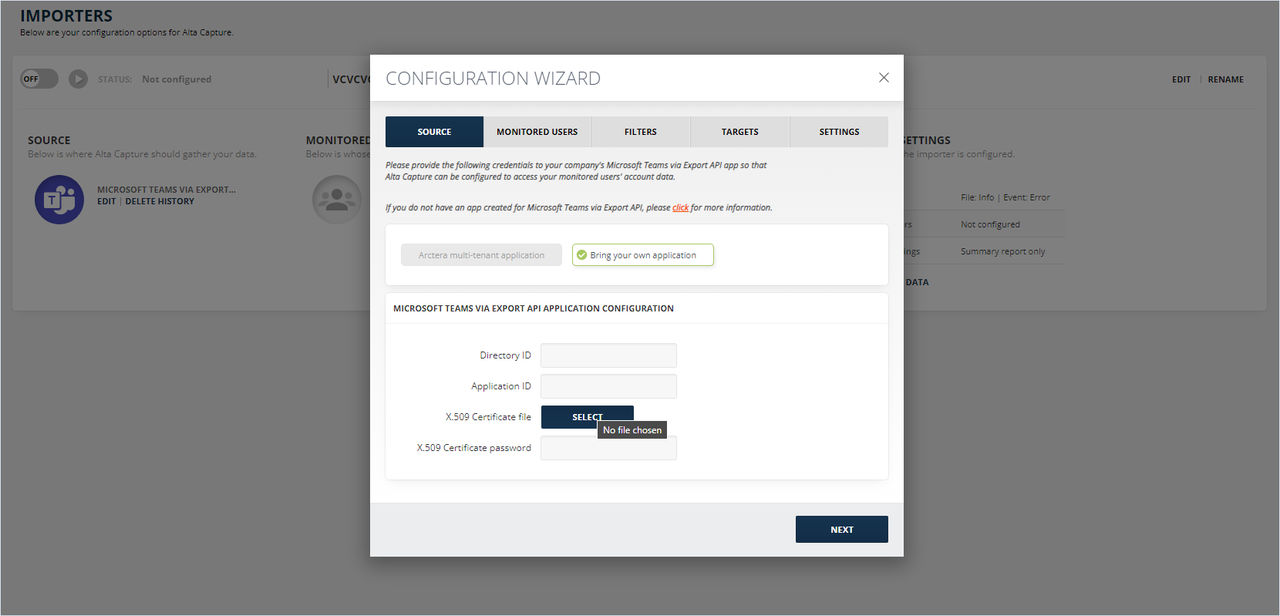
When integrating an Importer, the Importer Panel is added to the Configuration Screen. Each Importer Panel consists of five main tabs:
-
Source \- here you can find general information about the importer and edit it.
-
Monitored Users \- here you can find information about all the users of the collector monitors, and its configurations.
-
Filters \- here you can set up what information is sent to the target.Note: Filters are not apllicable to the EV folder target.
-
Targets \- here you can set up where the collector information is sent to.
-
Settings \- here you can change all the importer configurations.Note: It is necessary to configure all the tabs of the Configuration Wizard and SAVE the settings. When saved, you'll be redirected to the archive collectors list.
Related information