
Managing application-specific label groups
Application-specific label groups management covers creating, editing, deleting, activating, deactivating, propagating, and unpropagating operations. You must have the Manage Labelspermissions to perform these operations. By default, theApp Rule AdminandCompliance System Admin have these permission.
Creating application-specific label groups
To create an application-specific label group
-
In the left navigation pane, click Application.
-
Navigate to the Labelstab, and then clickNew.
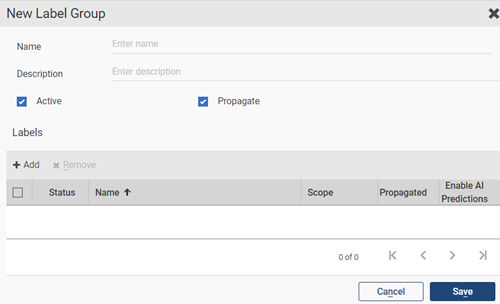
The New Label Group dialog box appears.
-
In the Name filed, type a unique label name.
-
In the Description field, provide a description of this label.
-
Select the Active check box to activate the label.
Do not select the check box if you want to keep the label in the deactivated state.
Note: TheEnable AI Predictionscheck box is not shown for the customer level label groups because each label within the group can be enabled while creating or editing them individually.
-
Select the Propagate check box to ensure the sub-departments inherit this label.
Do not select the check box if you do not want to propagate this label to sub-departments.
-
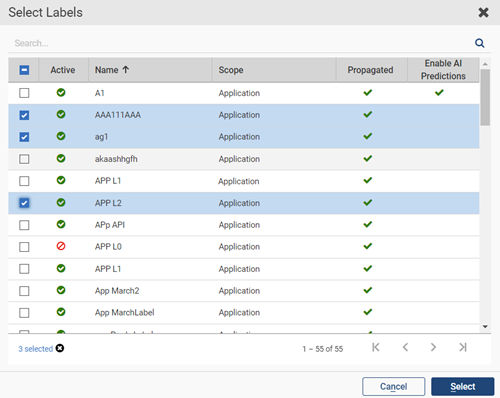
Click Addto open theSelect Labels dialog box.
-
Search for and select the labels that you want to this label group, and click Select as shown in the sample image below.
-
Click Save.
Editing application-specific label groups
To edit an application-specific label group
-
In the left navigation pane, click Application.
-
Navigate to the Labels tab.
-
Search for the label group that you want to update. See Searching application-specific labels, label groups, and single choice groups.
-
Select the label group and click the Edit icon in the same row.
-
In the Edit Label Group dialog box, update the details of the required fields or add or remove labels.
-
Click Save.
Activating application-specific label groups
To activate an application-specific label group
-
In the left navigation pane, click Application.
-
Navigate to the Labels tab.
-
Search for the deactivated label group that you want to activate.
-
Select the label group and do any of the following steps:
-
On the action bar, click Activate.
-
Click the Editicon in the same row. In theEdit Label Groupdialog box, select theActive check box.
-
The updated data appears on the Labelspage. If required, clickRefresh on the action bar.
Deactivating application-specific label groups
To deactivate an application-specific label group
-
In the left navigation pane, click Application.
-
Navigate to the Labels tab.
-
Search for the active label group that you want to deactivate.
-
Select the label group and do any of the following steps:
-
On the action bar, click Deactivate.
-
Click the Editicon in the same row. In theEdit Label Groupdialog box, clear theActive check box.
-
The updated data appears on the Labelspage. If required, clickRefresh on the action bar.
Propagating application-specific label groups
To propagate an application-specific label group
-
In the left navigation pane, click Application.
-
Navigate to the Labels tab.
-
Search for the unpropagated label group that you want to propagate.
-
Select the label group and do any of the following steps:
-
On the action bar, click Propagate.
-
Click the Editicon in the same row. In theEdit Label Groupdialog box, select thePropagate check box.
-
The updated data appears on the Labelspage. If required, clickRefresh on the action bar.
Unpropagating application-specific label groups
To unpropagate an application-specific label group
-
In the left navigation pane, click Application.
-
Navigate to the Labels tab.
-
Search for the propagated label group that you want to unpropagate.
-
Select the label group and do any of the following steps:
-
On the action bar, click Unpropagate.
-
Click the Editicon in the same row. In theEdit Label Groupdialog box, clear thePropagate check box.
-
The updated data appears on the Labelspage. If required, clickRefresh on the action bar.
Deleting application-specific label groups
To delete an application-specific label group
-
In the left navigation pane, click Application.
-
Navigate to the Labels tab.
-
Search for the label group that you want to delete.
-
Select the label group, and click Delete on the action bar.
Related information