
Managing department-specific label groups
Department-specific label groups management covers creating, editing, deleting, activating, deactivating, propagating, and unpropagating operations. You must have the Manage Labels permissions to perform these operations.
Creating department-specific label groups
To create a department-specific label group
-
In the left navigation pane, click Departments.
-
Search for and select the department in which you want to create a label group.
-
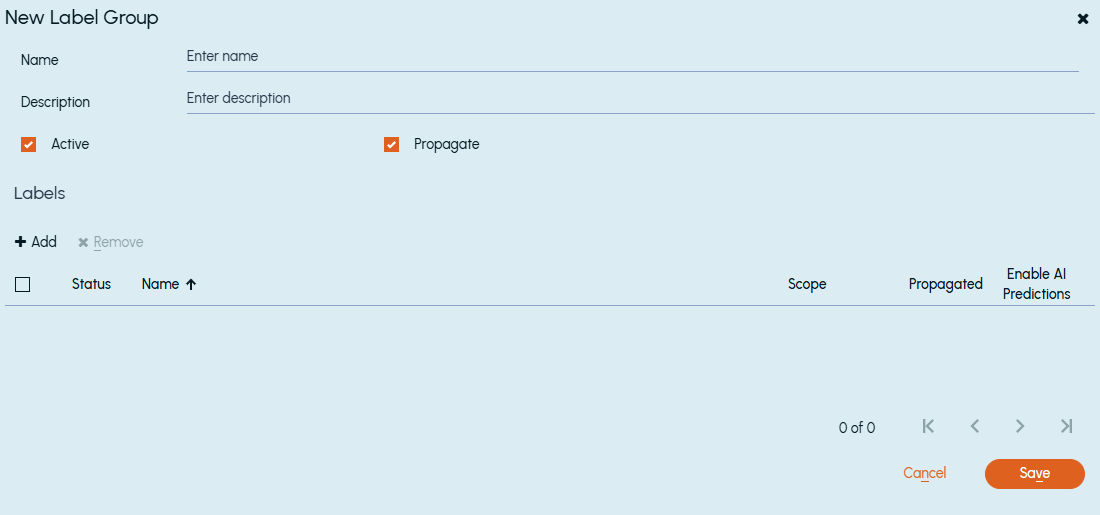
Navigate to the Labelstab, and then clickNew.
The New Label Group dialog box appears.
 |
|---|
-
In the Name filed, type a unique label name.
-
In the Description field, provide a description of this label.
-
Select the Active check box to activate the label.
Do not select the check box if you want to keep the label in the deactivated state.
Note: TheEnable AI Predictionscheck box is not shown for department level label groups because each label within the group can be enabled while creating or editing them individually.
-
Select the Propagate check box to ensure the sub-departments inherit this label.
Do not select the check box if you do not want to propagate this label to sub-departments.
-
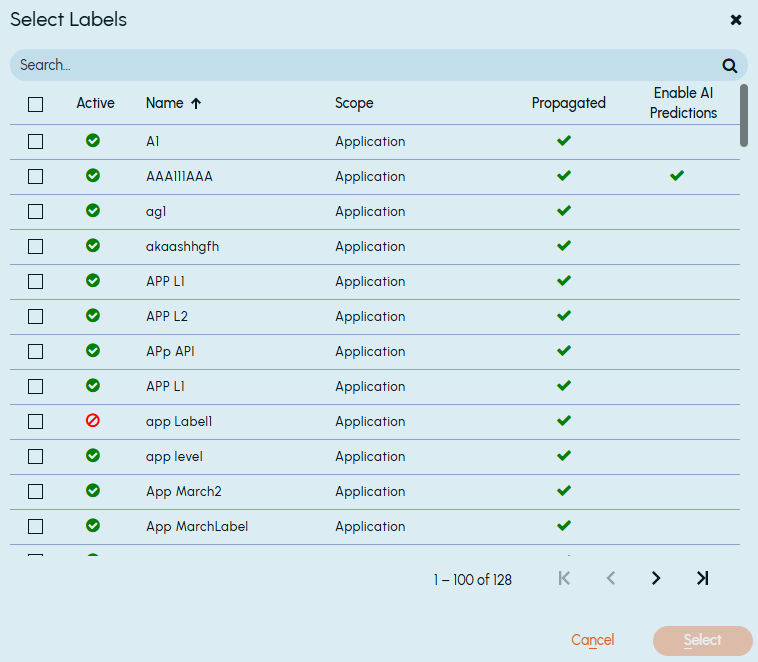
Click Addto open theSelect Labels dialog box.
-
Search for and select the labels that you want to this label group, and click Select as shown in the sample image below.
-
Click Save.
Editing department-specific label groups
To edit a department-specific label group
-
In the left navigation pane, click Departments.
-
Search for and select the department in which you want to edit a label group.
-
Navigate to the Labels tab.
-
Search for the label group that you want to update. See Searching application-specific labels, label groups, and single choice groups.
-
Select the label group and click the Edit icon in the same row.
-
In the Edit Label Group dialog box, update the details of the required fields or add or remove labels.
-
Click Save.
Activating department-specific label groups
To activate a department-specific label group
-
In the left navigation pane, click Departments.
-
Search for and select the department in which you want to activate a label group.
-
Navigate to the Labels tab.
-
Search for the deactivated label group that you want to activate.
-
Select the label group and do any of the following steps:
-
On the action bar, click Activate.
-
Click the Editicon in the same row. In theEdit Label Groupdialog box, select theActive check box.
-
The updated data appears on the Labelspage. If required, clickRefresh on the action bar.
Deactivating department-specific label groups
To deactivate a department-specific label group
-
In the left navigation pane, click Departments.
-
Search for and select the department in which you want to deactivate a label group.
-
Navigate to the Labels tab.
-
Search for the active label group that you want to deactivate.
-
Select the label group and do any of the following steps:
-
On the action bar, click Deactivate.
-
Click the Editicon in the same row. In theEdit Label Groupdialog box, clear theActive check box.
-
The updated data appears on the Labelspage. If required, clickRefresh on the action bar.
Propagating department-specific label groups
To propagate a department-specific label group
-
In the left navigation pane, click Departments.
-
Search for and select the department in which you want to propagate a label group.
-
Navigate to the Labels tab.
-
Search for the unpropagated label group that you want to propagate.
-
Select the label group and do any of the following steps:
-
On the action bar, click Propagate.
-
Click the Editicon in the same row. In theEdit Label Groupdialog box, select thePropagate check box.
-
The updated data appears on the Labelspage. If required, clickRefresh on the action bar.
Unpropagating department-specific label groups
To unpropagate a department-specific label group
-
In the left navigation pane, click Departments.
-
Search for and select the department in which you want to unpropagate a label group.
-
Navigate to the Labels tab.
-
Search for the propagated label group that you want to unpropagate.
-
Select the label group and do any of the following steps:
-
On the action bar, click Unpropagate.
-
Click the Editicon in the same row. In theEdit Label Groupdialog box, clear thePropagate check box.
-
The updated data appears on the Labelspage. If required, clickRefresh on the action bar.
Deleting department-specific label groups
To delete a department-specific label group
-
In the left navigation pane, click Departments.
-
Search for and select the department from which you want to delete a label group.
-
Navigate to the Labels tab.
-
Search for the label group that you want to delete.
-
Select the label group, and click Delete on the action bar.
Related information