
Generating a Storage Key URI
This section briefly navigates you to create a key vault. For detailed information, refer to Create a key vault using the Azure portal.
To generate the Storage key URI
-
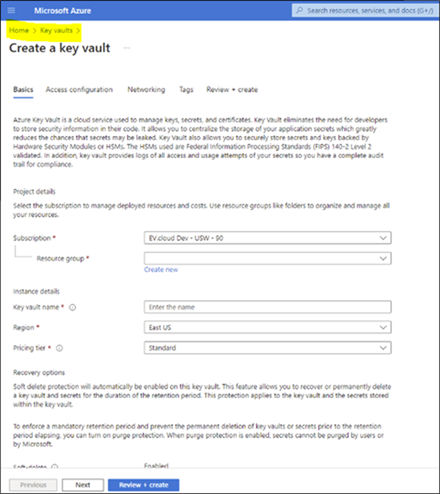
On the Microsoft Azure portal, select Home>Create a resource>Key Vault.
-
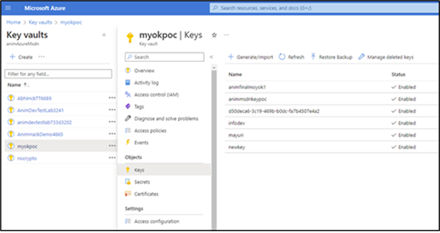
On the Key Vaults page, in the left navigation pane, underObjects, select** Keys**, and click** Create**.
Note: The Azure Key Vault must be created with** Purge Protection** enabled.
-
Specify the mandatory field details, and click Next.
-
Click Review + Create to create a Key Vault.
-
Select this Key Vault and click Keys.
-
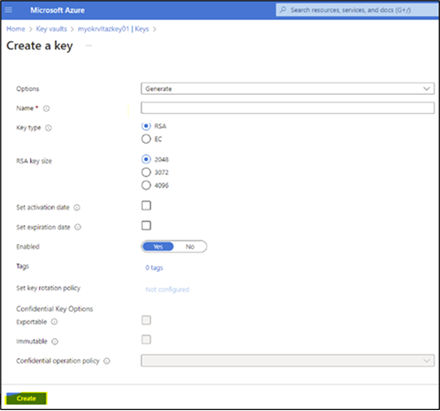
Click Generate/Import to create a key.
-
On the Create a key page, specify the field details, and clickCreate.Note: When creating a key, do not select theSet activation dateandSet expiration datecheck boxes. These fields must remain blank.
The key is created and listed as shown in the sample image below.
-
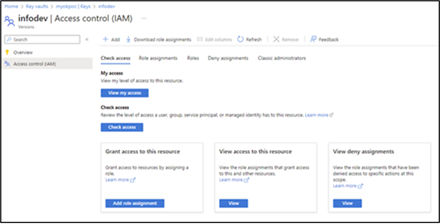
Select the key and click Access Control (IAM).
-
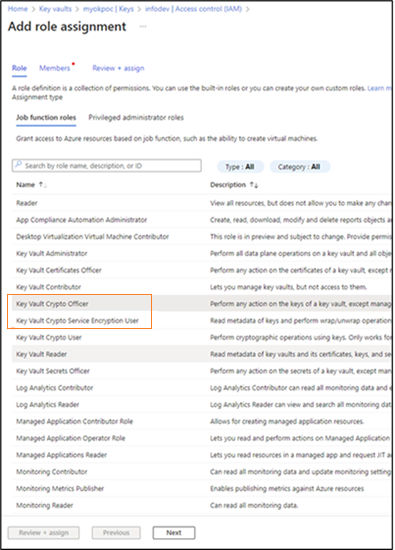
Click Add role assignment. On the** Add role assignment page, select the Role** tab, then select any of the following roles:
-
Key Vault Crypto Service Encryption User
-
Key Vault Crypto Officer
-
Note :
-
To assign permissions to the application, a user can have either the Key Vault Crypto Officer role or the Key Vault Crypto Service Encryption User role.
-
However, to create an encryption key, the user must have the Key Vault Crypto Officer role or a higher-level role with access to Key Vault and permission to create keys.
-
Click Next to access theMembers tab.
-
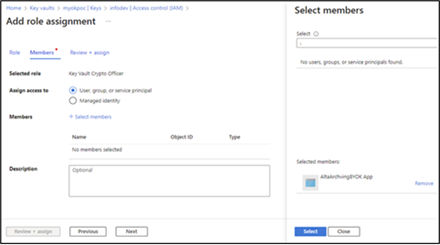
On the Add role assignment page, select the Members tab, and click\+ Select members.
-
Select the Azure app that you have created and installed. See See Installing the Azure App and assigning it the Admin role.
-
Click Next and Save.
-
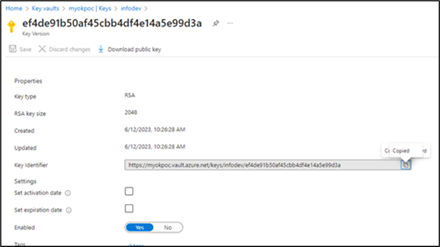
Select the key and click Overview.
-
Copy the key Identifier value and go to the Service Alert window of the Management Console.
Related information