
Adding employee groups
Like adding users (employees) from Microsoft Azure Active Directory, you can add new employee groups to Arctera Surveillance from the Microsoft Azure Active Directory. After the employee groups are successfully added, their records are automatically synchronized to display the corresponding group members. Additionally, you have the option to manually initiate synchronization.
If you no longer need certain employee groups, you can remove them from Arctera Surveillance. When you remove employee groups from Arctera Surveillance, these groups are not deleted from the Microsoft Azure Active Directory. However, if the employee groups are deleted from the Azure Active Directory, they are removed from the Arctera Surveillance database after the next successful synchronization. If the employee groups are later restored in Microsoft Azure Active Directory, they are automatically added back to the groups list in Arctera Surveillance during the next synchronization. To permanently delete a group, you should delete it from the Azure Active Directory.
You must have the Manage Employee Groups permission to add employee groups from Microsoft Azure Active Directory. By default, users with the App User Admin application role have this permission.
To add employees and employee groups
-
In the left navigation pane, click Groups.
-
Expand the Employee Groups section, if not expanded by default.
The application displays the currently available employee groups in Arctera Surveillance as shown in the sample image below. To sort employee groups in either ascending or descending alphabetical order, click on the Name column heading.
-
To view the employee group details, select the group.
-
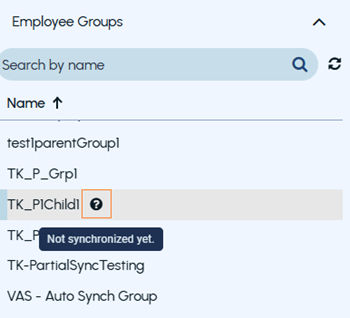
Hover over the status icon adjacent to the employee group name to view the status of synchronization with the Azure Active Directory.
-
On the right side, the General tab is displayed by default. It provides the name and description of the group, total members in the group, status to search the nested groups, and the date when this group record is lately synchronized with the Azure Active Directory.
-
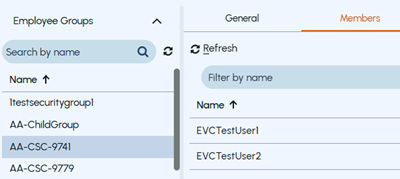
Click the Members tab to view the details of group members. This is a read-only information. After group record synchronization, addition or deletion of members is updated on this tab.
-
To sort member names in either ascending or descending alphabetical order, click on the Name column heading.
To search members by name, specify a few characters of member name, and click the filter icon or press ENTER.
To view members from other pages, use navigation arrows in the bottom of the dialog box to go to the next or previous pages.
-
To manually synchronize the group record across departments, click Synchronize. The application displays an alert as shown in the sample image below.
 Note: The application takes some time to update the record. Besides that, the application automatically synchronizes the record with the Azure Active Directory every 15 minutes. ClickRefreshto view the updated details.
 -
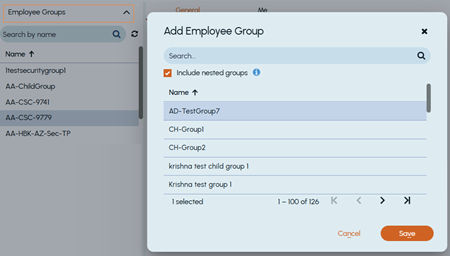
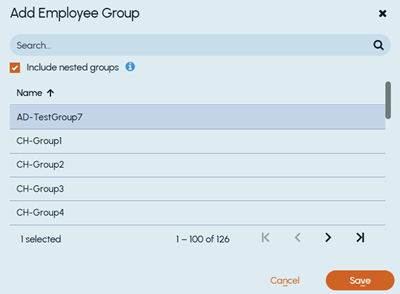
To add a new employee group, click Add Group. In the** Add Employee Group** dialog box, do the following:
-
To sort employee groups in either ascending or descending alphabetical order, click on the Name column heading.
-
To search a group, in the Search field, specify the group name characters, and click the search icon.
-
To manually search a group, use navigation arrows in the bottom of the dialog box to go to the next or previous pages.
-
To include all the members from the nested groups, select the Include nested groups check box.
-
To add the selected employee group to Arctera Surveillance, click Save. Wait for some time for record synchronization.
-
-
To remove the existing employee group, search for and select the group you want to remove, and click Remove.
Related information